Sunday, November 17, 2019

Award Winning Focaccia

Samin Nosrat's Ligurian Focaccia - addictive bread that's easy!


Yes, I won a first place at the Ventura County Fair with this. This is about the easiest bread recipe ever - there's no kneading, you use your hands for mixing, and it tastes amazing when it's done. All it takes is time (overnight). The recipe comes from Samin Nosrat's show and book Salt, Fat, Acid, Heat.  There's several versions of the recipe online, and there's also a clip of her Netflix show where she makes it, and a really good episode from Bon Appétit's video series.


Samin's recipe

Wet:
  • 600 grams lukewarm water (2 1/2 cups)
  • 1/2 tsp active dry yeast (a lot less than a packet)
  • 15 grams of honey (about 2 1/2 tsp)

Dry:
  • 800 grams AP flour (I'm using King Arthur, but I doubt it's critical for this.  You probably don't want to use bread flour). Weigh it don't measure it by volume, or the dough might be too wet or dry.
  • 18 g Kosher salt (2 Tablespoons) (or 1 Tablespoon fine salt)
  • 1/4 cup of extra virgin olive oil.

Brine:
  • 1 1/2 tsp Kosher salt (5 grams)
  • 1/3 cup warm water (80 grams)
Rosemary (optional) and flaky salt for sprinkling just before baking.

  1. Mix the wet, and wait for bubbles. Mix the dry. Mix wet and dry to make a gloppy wet dough. 
  2. Let rise in an oiled container for 12-14 hours. 
  3. Pour dough into a well oiled half sheet pan. Make sure all surfaces are oily. Stretch to the corners with oiled hands and fingers repeatedly over about 30 minutes. 
  4. Sprinkle with rosemary, if desired. Dimple the surface, pour on the brine. 
  5. Proof for 45 minutes.
  6. Sprinkle with large crystal salt (like Maldon). 
  7. Bake at 450 with the pan on a pizza stone for 25-30 minutes, until bottom is browned. If top needs more browning, move up in the oven for 5-10 minutes.
  8. Pour a few more tablespoons of oil on top and let soak in. 
  9. Remove from pan and cool for 15-20 minutes. 
  10. Eat it while it's warm.

There's really only one part of the recipe online that's a bit vague, and it has to do with the "cooking on a stone or turn a pan upside down" - If you've got a pizza stone in your oven, put the sheet pan with the bread on top of it (don't try to put the dough on the stone). If not, put another pan upside down when preheating, and put your bread pan on top of it. The important thing is that you need a heat storage to get plenty of heat to the bottom of the dough filled pan so the underside crisps up and browns nicely.

Plenty of Olive Oil


The key to this recipe is "plenty of olive oil" - You're going to need a fair amount beyond the 1/4 cup in the dough.  You need oil to cover your hands when you're mixing the really wet dough.  You need oil to coat the inside of the container the dough rises in. You need oil to pour in the sheet pan before spreading the dough. You need oil on your fingers so the dough doesn't stick to it. You need oil to pour on top of the bread before and after cooking.  Fear not - the bread does not come out like a greasy dough ball. It rises so much that just the crust is crisp and fried tasting.

I have made this with two different kinds of oil, both from Rancho Olivos (in Los Olivos, CA) - their Arbequina and their Italian Blend, and I don't know that there's a significant taste difference after cooking. They're both fairly mild flavored and they have that wonderful grassy smell when you're working with the dough.


Some pictures

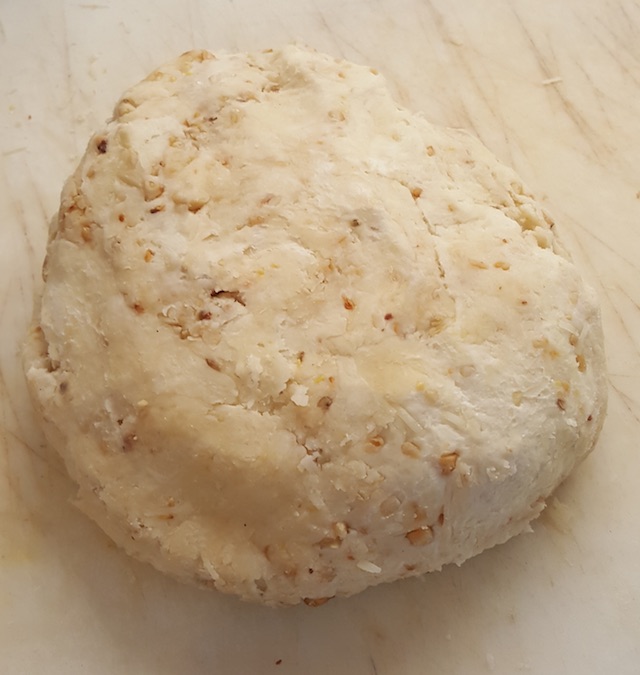
Here's some pictures of the first part of the process - the two videos linked above show the essential "put it in the pan and stretch and poke it" part as well as the salt brine. It starts by mixing the dry ingredients (flour and salt), starting the yeast (warm water, honey), then mixing it all together with the oil.  I used a 8 quart Cambro container which works well for both the mixing and the overnight raise.

Dry ingredients
Yeast happily bubbling


The dough is very wet and gloppy.  Your hands work well for mixing. I'm sure people have been doing it with their hands for millenia. Some oil on your hands helps.

 
Ultimately, you're going to want to dump the dough into something else temporarily, then grease up the inside of your container, and dump the dough back in.  Put it somewhere warm (in July and August in Southern California, that's "leave it on the counter") overnight.  The recipe calls for 12-14 hours, so if you start the evening before, do the mixing, let it sit, make breakfast, then finish the proof and bake, it will be done for lunch time.  This rise is way more than doubling in volume, even though there's only 1/2 teaspoon of dry yeast (a packet is 2 1/4 teaspoons).

Starting rise
Finished rise the next morning

Then, you go through the process of oiling up your sheet pan (a raised rim half sheet pan 13x18") dumping in the dough, spreading it out (stretching it to the corners - it will shrink back, stretch it again for about 30 minutes). I sprinkle the chopped rosemary on at this point. Dimple it (see the video, it's not explainable), pour the brine on, then proof for 45 minutes.  Sprinkle on plenty of flaky salt (if you put the salt on earlier, it dissolves in the brine and dough and bake.

The final steps


Rotate the pan half way through (nobody has a perfectly even oven - you can see how mine is distinctly warmer on one of the long sides in the middle. When it looks done on top, pry up a corner to see if it's done on the bottom.  Pull it out, pour on some more oil, let it sit a bit, then turn it out on a cooling rack.


This was pretty easy, and it tastes awfully good, so I decided enter it in the Ventura County Fair in August 2019 - and it won in the Focaccia class.  I baked it early in the morning of the entry day, got it to the fairgrounds still warm, cut the required size piece, and left the rest with the ladies running the entry booth.

Sunday, June 16, 2019

Sausage making - Andouille, Spicy Italian

This is a fairly long post, covering the whole process, from cutting up the meat, seasoning it, grinding, stuffing, and then final preparation.

Cutting up the shoulder and fat


The pork shoulder you get at the supermarket tends to be a bit lean - they trim the excess fat off, maybe leaving a thin fat cap (which is always on the hidden tray side).  You can ask them for the shoulder with more fat, but you're going to pay the full price for the fat, which seems a bit silly, but is an expedient solution.  Tell them you're going to be grinding it for sausage. For good sausage, though, you want more than 20% fat, so having a source of fat you can add is a good thing. I have several pounds of nice pork back fat from a CSA in the freezer, and I use that to boost the fat content.

Bone-in pork shoulder is a lot cheaper than boneless. The bone-in was $5/lb, and the boneless is $6 or $7/lb. As it happens, out of this 4.75 lb (76 ounce) roast, the bone was 10 ounces, or about an eighth of the total weight. Your mileage may vary and "retail price" for the meat tends to go in 1 dollar steps. In any case, you need to cut the bone out.  Next to the bone, you'll sometimes find a sort of gloppy soft fat, as well as the sinews that connect the muscle to the bone.  You want to trim those out of your meat - they don't help the sausage, and will gunk up the grinder.


After removing the bone, it's time to slice it into appropriate sized chunks. I like chunks about an inch on a side, so I start by slicing the roast into 1" slices, and then cutting up those slices. There's also a picture of some gorgeous back fat which I've cut into roughly 2" cubes and wrapped in wax paper before freezing. It's much like cutting up butter. The whole fat/meat ratio is something you sort of wind up doing by eye. It just looks right.


This tray goes in the freezer to chill the meat and fat. That keeps it from melting during the grinding process.

Getting the seasoning together

Up to this point, pretty much all sausage is the same - you want that same ratio of fat/meat.  For this batch, I'm making Andouille, using the recipe from Rulhman's book. I typically want it a bit spicy, but not lava - so when you see the recipe, adjust the cayenne and pepper flakes accordingly.  Andouille uses some pink salt which turns the meat a reddish color as it cures/cooks in the smoker. This andouille recipe has the dry mix plus diced onions.


And here we are, with the meat cut up, fat cubes added, and seasoned. Back into the freezer while the grinder gets assembled.


Preparing the grinder

I'm using my trusty Kitchen-Aid grinder, which has two grinding plate sizes. For this, we're doing a single grind through the fine plate.  Other sausages (like breakfast sausage), you might do two grinds, one through a coarse, and then a second through the fine. Or, if you want distinct chunks, the coarse might work for you. Here's all the pieces of the grinder.  The two plates are on the left, and the cross shaped thing is the actual blade that does the cutting.  I throw all the pieces in the freezer while I'm working on the meat, so that they are chilled before grinding.


Put the auger into the housing.


Blade on the end of the auger.


Put the Appropriate plate (fine, in this case) on top of the blade.


And you put the nut on the whole thing and tighten it down.

Now, were ready to grind.  I put the bowl into a bowl of ice cubes to help keep it cold.

And away we grind

You set the mixer to speed 4 (the second click) and start feeding the cold meat into the hopper. I keep a mixture of fat cubes and meat, and just keep it going.


At the end of the grinding process, I run a couple pieces of paper towel into the hopper, and that pushes the last bit of meat out.  Here's a picture of the auger after disassembly, with the paper towel wrapped at the end. 


Here's the blade  and plate - the stuff around the center of the blade is sinew and soft connective tissue.  This is why you want to try and trim it out when you're cubing the meat.


After grinding, it's important to mix the forcemeat thoroughly - this helps develop the internal structure and makes it hang together. The grinding process cuts all the muscle fibers, releasing a variety of substances, and you want things like myoglobin to make the meat stick together. That's also why you need salt.  When it's done, it has a distinct sticky feel and uniform look.  Some sausages don't need quite this much mixing - if you overdo it, you're making an emulsion, like in hot dogs or mortadella.


Stuffing

Stuffing the sausage has 3 steps - getting the casing ready & loading the stuffer; then actually stuffing; and finally making links.

Getting the casings ready

The casings come in roughly 10 foot lengths, with a bunch of them in a hank in a plastic bag with lots of salt. They might well be shelf stable at room temperature, there's a lot of salt on them, but I do keep them in the refrigerator.   I separate out 3 strands from the mass (which always seems to get all tangled up, like kite string), and put the remainder away.


You soak the casings in water for about 20 minutes, after rinsing the outer salt away. This is really important - the salt has extracted all the water from the casing (and preserving it), but you need to put that water back in, so that they are flexible and elastic again. I fill the casing with water and drain it 3 times to rinse any salt from the inside of the casing.
 

Yes, the casings are made from pig intestines (at least these casings are - you can also get sheep and beef casings which are smaller and larger respectively).  There are "non-animal" casings made of cellulose, and I started with those - they don't work well - they're not as stretchy and strong, and that's really important when you start stuffing them. I've had really good luck with the hog casings - The only time I have them break is if it's damaged, or I accidentally poke a hole in it.  They're roughly the size of your finger and will be about twice that diameter after stuffing. (somewhere I have a picture of the kids making balloon animals with inflated casings).


Preparing the stuffer

I have a nice 10 pound stuffer with a geared crank handle to run the piston down the cylinder. My largest batches are 5 pounds, so it works pretty well.  There's a whole range of spouts you can put on for the various size casings. There are also horizontal stuffers with a sort of lever arm that pushes the forcemeat through - I've not tried one, but acquaintances who have say the vertical stuffer is better and more controllable - gear drive helps.

I started trying to use the stuffer nozzle on the Kitchen Aid - that was horrible - the hopper was very small, and you can't start and stop easily. With this stuffer, you can put the entire batch into the cylinder, and all you have to worry about is cranking the piston down. A motorized stuffer is going to need a foot switch, because you need at least one hand to hold the casing as the forcemeat squirts in, and a second hand is handy. With a hand crank, you crank with one hand, and hold the casing with the other.

You start by putting the casing over the spout - I have a baking sheet with the wet, rinsed casings on it, and then, I start feeding it onto the spout, until it's all loaded.


And then it's crank with the right hand, hold the casing in your left. I try to make the coils neat and not kink it. The water on the pan helps things slide around.


Making links

"linking" is one of those things that gets easier with practice. I try to make my links about a handwidth long. You grab the filled casing, squish it with a thumb and forefinger on either side, and then sort of twirl the casing to twist the link ends. You wind up basically doing every other link this way, and the twists are opposite on each one. 

I then tie short pieces of string around some of the twists, because I'll need that to hang it in the smoker.


Chilling after smoking


After the sausage comes out of the smoker, you cut the links apart (the twisted part of the casing is all dry and hard now) and dump them into an ice bath to rapidly cool it. I would think that any pathogens inside the sausage are dead (heat and nitrite and salt), but there will still be things on the surface. And you don't want to put hot sausage into a cold refrigerator.


Spicy Italian 


I'm using the recipe from Ruhlman for this, too.  It has paprika in it to give it that distinctive red color, along with toasted coriander and fennel seeds, along with fresh oregano and basil.


For the Italian sausages, they're a fresh sausage, not cooked.  After stuffing, I put them in the refrigerator for a few hours so that the surface of the casing dries.  Once the casing is dried off a bit, they're ready for vacuum packing and freezing.


Friday, March 15, 2019

Vegetable Tart


This is a vegetable tart made for Pi Day (3/14) - it's based on a recipe from Kevin Isaacson (exec chef at the Caltech Athenaeum) which in turn is basically a standard short crust and custard.

The Vegetables

I used asparagus, cherry tomatoes (cut in half) and ribbons of yellow squash and zucchini. One thing to be aware of when making these tarts is that vegetables that have a lot of water (zucchini and tomatoes, for instance) can exude all that water during baking and affect the texture.  So what I did this time was roast the tomatoes in a 375 oven for about 10-15 minutes before using them. Put the tomatoes on the pan, use a liberal amount of oil, a sprinkle of salt, and roast away.


The ribbons could be done with a mandoline, but I just used a vegetable peeler.  After letting them sit for a bit, I blotted them dry using paper towels and rolled them into rosettes. The crust has toasted pine nuts and grated parmesan cheese in it, so I toasted the nuts and chopped them up before starting the crust.  There's a discussion on toasting pine nuts at the end.


The crust

The crust is where a pie or tart starts.  The recipe, by mass, is 3:2:1 of flour, cold butter, and ice water. The flour (2 cups of AP flour unsifted) with 1/2 tsp of salt is mixed with chunks of butter (6 oz), run with the mixer until "size of walnuts" - basically you want chunks still, not to the "coarse cornmeal" stage you might use for scones. Then you add the ice water and mix minimally until the dough "comes together".    Once you're at this stage, you add in some interesting flavors: in this case, toasted pine nuts that have been chopped up, and some grated parmesan, about 1/4 cup of each, but it's not super critical. Roll it and fold it  and roll it a couple times, wrap it in plastic and put it in the refrigerator to chill. You want the butter to be fairly hard, and the rolling and folding makes the butter into flat pieces in the crust.

Flour in the mixing bowl.  There's about 1/2 tsp of salt in the 2 cups of flour, and it's something you don't want to omit. sI did this once by mistake and it creates a peculiarly bland pastry that tastes very odd.  Fortunately, I caught it when I was tasting the crust trimmings after blind baking the shell, so I salted the crust before filling it.  The crust was still a bit weird, but it rescued the tart after all.


I've tried the freeze butter and grate it approach, but the cubes seem to work better, and it's faster anyway. You run it in the mixer until the cubes are fairly broken up. The recipe says "size of walnuts" which doesn't tell you "in the shell, shelled, or chopped". Other recipes say "pea sized".  In any case, you want distinct lumps of butter still, not the "coarse cornmeal" texture you might use for scones.  Older recipes say "rub in the butter" and that actually works pretty well if you're doing it by hand.  You squish the butter morsels between thumb and fingers covering them in flour, so you wind up with little flakes of butter.  This works better in a freezing cold kitchen in England than in a warm kitchen in southern California. The whole goal here is "cold butter chunks which will be squashed flat by the rolling" and warm hands in a warm kitchen gets you to the wrong place.


After you've mixed in the ice water, this is what it looks like.  The warning is to not over mix - just until it sticks together. Too much water, and you wind up with oily pizza dough and the temptation to over-roll and work it.

I mixed in the toasted pine nuts and grated parmesan cheese.  Then I did a few "roll it to about 1/2" thick, fold it over, roll it again" cycles.  This is truly one of the things where it took doing it a few times to get the right feel and butter lump size. Your first batch will be ok, and casual observers will be hungry and not picky about the texture, but after a few tries, it comes out much more consistent.

And here's the lump of crust, ready for chilling. Smash it out flat until it's about an inch thick, wrap it in plastic, and put it in the refrigerator. Chilling is essential. By the time it's had the nuts worked in, it's getting pretty warm and soft.  Play-doh consistency is too soft. You want it to be like a rock when you roll it out for the crust where you really have to lean into it when rolling.

Preparing the tart shell

The next step is to roll the crust thin, make the shell in the pan and blind bake it.  It will then cool  before filling and the final bake. I've left out the cooling step, and it sort of works, but the crust gets wetter. I've even baked a tart without doing the blind bake step - that was distinctly a soggy bottom scenario, and it actually leaked (I didn't do a good job sealing the gaps when putting the crust in the pan).

I rolled the dough out to 1/8" thickness and made sure it's going to fit. You'll see people using a ruler to measure their pan and then measure the dough.  Sure, you can do that, but I just put the pan on the rolled out dough and see if it will fit.  In this picture, the dough needs a bit more rolling out. When I've made it in the 4x10" rectangular pan, you wind up with a lot of extra dough. You probably only need half the amount as you do for the 10" round pan here.

I carefully draped it over the pan, and pushed it into the corners. Tart pans have fluted edges, and I pressed the dough into the flutes, so that you get that pretty outer crust.  I think also that the flutes are important from a baking consistency case - they brown up nicely and are a bit crispy. The dough should be fairly fragile (if you've over worked it so that it's like pizza dough, it will wind up tough), and tears and rips happen.  It's easy, you wet your finger, wipe it on the edges of the tear, and stick it back together.

 
In the picture above, I've trimmed it so about 1/2" sticks out past the edge.  I have trimmed to the edge before, but I found that the crust shrinks back a bit when baking, and you lose some edge height.  The final step is to "dock" it - poke it with a fork and put lots of little holes in the bottom.  This lets some of the steam out during baking so the bottom doesn't puff up too much.


Lay in parchment paper, fill it with beans, and bake it for 15 minutes.  After 15 minutes, pull the paper and beans out, then bake it again for another 5-10 minutes until the top of the crust just starts to brown.   Then you put it aside and let it cool.  There is nothing special about the beans - I'm sure you can go to a fancy store and buy artisanally hand-crafted pie baking weights, carved from the finest Carrarra marble. The whole idea is to provide something so that while the crust is baking, and that butter gets real soft, that the crust holds its shape. 


So here's a secret - really shove the beans up against the sides - it's the sides that want to collapse.  The crust in the bottom is laying flat, it's on a double layer of pan, so it doesn't get as hot. The other thing is to trim the parchment paper fairly close - if you've got a big piece of paper hanging over the edge, the crust doesn't bake as fast.  In most ovens, a good fraction of the cooking is done by radiant heat from the oven sides, not conduction from the hot air. The bottom of the crust is cooked entirely by conduction from the pans and through the beans on top.

While it's cooling, that's when you make the custard mix and prep all the vegetables.


Custard Mix

The custard is pretty standard and I've made it using all sorts of variations. 

  • 2 eggs
  • 1 cup of heavy cream
  • 8 oz of goat cheese (I found out that goat cheese comes in logs of various sizes that all look about the same, I've seen 6, 8, and 10 ounce sizes - frankly, for this recipe, it makes no difference)
  • 1/2 cup of grated cheese (Parmesan or Gruyere - I used a mixture, since I didn't have enough Gruyere to make a 1/2 cup)
  • a few tablespoons of Basil as a chiffonade - I grab a bunch of leaves, stack them up, roll it, and slice thin. Don't do this part ahead of time - Basil turns gross and black almost instantly when you cut it. 
  • Salt and Pepper

I've done this using Ricotta cheese (Chef Kevin's original recipe called for Ricotta, but in another instance, he used goat cheese). You might be able to use half and half, but I bet it will taste a bit flat. I think you could also go with only egg yolks too. Depending on what other stuff is in the tart, picking a different kind of cheese and/or using another kind of herb  might be a good idea - Oregano was a bit strong when I tried it, but thyme works ok.

Baking

I trimmed off the excess crust, so the tart matched the pan. It's easiest to do this when the crust has cooled a little bit, but is still a bit warm. This is your chance to taste the crust by itself so you can figure out if you made an egregious error like leaving the salt out.


I started by laying in a base of caramelized onions.  There's 3 medium onions here, making a layer about 1/8" thick in the bottom. The original recipe did not call for doing this, but I started doing it when making breakfast tarts (onion in the bottom, then ham or sausage and custard, then vegetables on the top). It took me a good 45 minutes to caramelize the onions - recipes are notorious for saying stuff like "Caramelize onions - after 10 minutes when onions are a mahogany color" - nope, not in 10 minutes.  It takes 45 minutes and trying to do it faster just burns the onions.

 
After that, I arranged the asparagus spears in a radial pattern, poured the custard mix in, then put a half roasted cherry tomato and a couple coiled up ribbons in each segment. If you're using a rectangular pan (which totally inappropriate for pi day, but what I normally make my tarts in), you can use a repeating pattern.  I've done it where I lay the asparagus spears over the whole tart the short way, or do some sort of pattern with slices of bell pepper. Chef Kevin's original recipe had ribbons of squash (1/8" thick, substantially thicker than mine here) inserted into the custard, sticking up.


The recipe calls for baking 20-25 minutes at 375, but I've found that's almost never enough. I typically wind up baking for another 10-15 minutes in 5 minute increments.

I test the custard temperature with a fast reading thermometer - 180F seems to be nicely done and set. 160F is still a bit soft.  I got a Thermoworks ThermoPop a while ago and it's really nice.


Toasting the Pine Nuts

I made this crust once without toasting the nuts. It sort of worked - the nuts do cook when the crust is baked and again when the tart is baked, but the consistency was weird. Toasting pine nuts is tricky - they go from totally untoasted to burnt pretty quickly so this is something you can't multi task on.  I just put the pine nuts in a saute pan, heat it up, continuously moving them around until they nicely browned - smell is probably your best clue when it's about done. Another oddity is that as the nuts heat up, their oil softens and they get sticky, so keeping them moving in the pan requires more active work. Here's your chance to work on that "flipping the saute pan and keep the food in the pan" thing.